Print Process
Add Printing
Quantity
Corners
Proofing Method
Time Frame
Free Shipping!
Set yourself apart from the standard rectangular card with a die-cut shaped business card! Guaranteed to make your branding stand out, we have a wide variety of pre-made shapes for you to choose from. Ranging from rounded corners to classic tickets, bite marks to bubbles, we have something to boost your brand.
Discover the exquisite qualities of 16pt Vibrant Gray, the smoothest of all our elegant Premium Gray stocks. The 18pt Cool Gray offers a more individual tone and more papery texture, while 18pt Dark Gray boasts a gorgeous shadowy shade with a natural feel. Our 20pt Gray Pulp is made from 90% recycled content and possesses the same unique texture of our other Pulp stocks but in a beautiful gray colour.
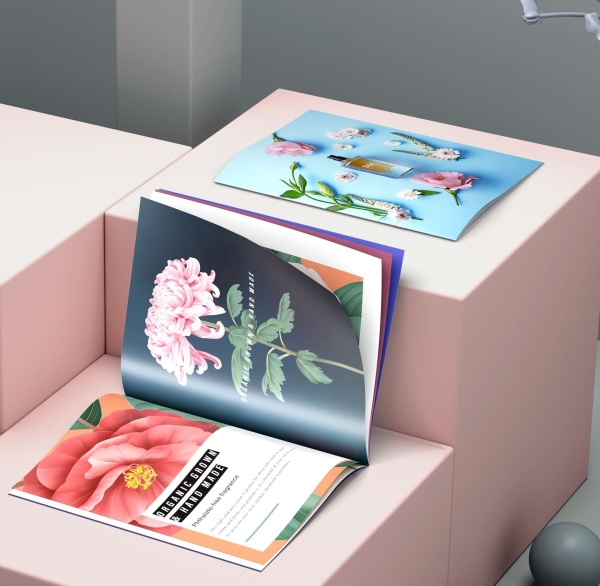
Do you need a promotional product that is designed to stand out? With five different options to choose from our mini brochures are a perfect option if you are looking for something compact while maintaining a cute, contemporary look that will stand out to your client. As one of our more versatile options we think these are perfect for businesses like photography studios, bakeries, florists, and believe they are excellent options for rate cards and special announcements.
Whether you want to bind your product catalogs or informative booklets, we provide our customers with perfect bound books. Unlike traditional saddle stitched method of binding, the perfect bound method is unique, stylish and gives your books a cleaner finish. With this versatile service, you can not only create catalogs and booklets but also storybooks, yearly diaries, and notebooks, which can be used in-store, at events and trade shows.
Home / Business Cards / Spot UV Business Cards
Experience the excitement of a unique business card with added spot gloss.
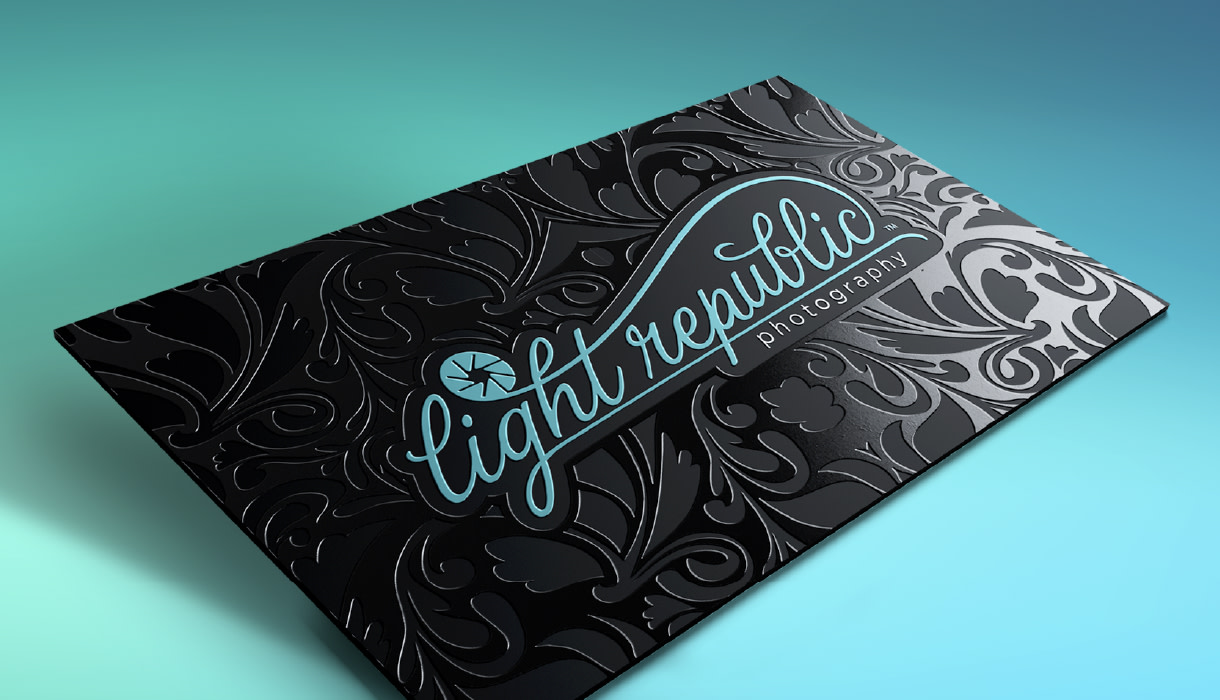
Spot UV, also referred to as Spot Gloss, is an exceptional design enhancement technique. Its specifically placed clear, shiny coating creates a striking contrast with the underlying finish, making it a clever design element that looks impressive. To guarantee the highest quality business cards, we use a thick 20pt paper with a soft touch coating for our Spot UV cards. This results in a thick, sturdy, and premium card overall.
Any artwork to be printed to the edge must be extended to this area.
Keep important information out of this area.
This is where your business card will be cut.
If you're ordering specialty print finishes like Spot UV, Embossing, Debossing, or Foiling, it's important to set up your design files correctly. These finishes add a unique, eye-catching touch to your prints, but they require a bit more attention to detail during the file preparation process. This guide will walk you through the steps to ensure your files are ready for production, helping you achieve the perfect look for your project.
Start by setting up your design as you would for a standard CMYK print job. If your product requires CMYK files, follow the usual guidelines to create them. Some products, like Premium Black, won’t need CMYK files—if that's the case, you can skip this step.
Once your design is complete, export the front and back as press-ready PDFs, clearly labeling them with "Front" and "Back" in the file names. These files will only include the basic design, without any of the specialty finishes.
Example:
Next, you’ll need to create a black-and-white file that shows where the specialty finish will be applied. You can do this by adding a new layer, creating a new artboard, or setting up a separate file in your design program. In the example below, we’ll show you how we set up files for our popular Spot UV process:
Black Areas: These represent where the treatment (e.g., Spot UV, Foiling) will go.
White Areas: These will remain untreated.
Make sure the black you use is 100% K (K100) in CMYK. We recommend using vector-based programs like Adobe Illustrator or InDesign for best results, especially for embossing, debossing, and foiling. While you can create Spot UV files in Photoshop or other pixel-based formats, it can be trickier to get the details just right.
K100 Black
CMYK: 0, 0, 0, 100
Before exporting, double-check that your separation files line up perfectly with the original CMYK artwork from Step 1. This helps ensure everything aligns correctly during the printing process.
Export each separation as a press-ready PDF, using clear and consistent file names:
Type | File Name | Example (Front) |
Spot UV | UV | Set1_Front_UV.pdf |
Emboss | EMBOSS | Set1_Front_EMBOSS.pdf |
Deboss | DEBOSS | Set1_Front_DEBOSS.pdf |
Foiling | FOIL_[colour] | Set1_Front_FOIL_Gold.pdf |
If you're using multiple treatments on one side, create separate files for each one. For example, if the front of your design includes both Spot UV and embossing, you’ll need separate files for each.
For this example, there are four files generated:
Once your files are ready, upload them through our order system. Be sure to include every file required for your project to avoid any delays. If you're unsure whether your file is set up correctly, make sure to select the Online PDF Proof option when placing your order. This allows us to review your file and ensure it's 100% perfect before it goes to print.
Wrapping Up
Getting your design files right is key to making sure your specialty print finishes look amazing. By following these steps, you’ll help ensure that your project turns out just the way you envision it. If you have any questions or need help along the way, our support team is always here to assist.
Yes, our spot UV stickers are waterproof, and ideal for indoor and outdoor use.
See: Stickers Fast Facts
Small areas and detail (smaller than 1pt line weight) may fill in/disappear when the Spot UV is applied - especially when reversed out. Thin lines might not print consistently.
The Spot UV coating is not as crisp and consistent as CMYK print. The CMYK colour print portion of this stock is offset quality with a 420 linescreen.
See: Design considerations for Spot UV.
Our Prepress department is responsible for assessing files for potential print errors. Examples of these errors include incorrect bleed, colour space or low resolution photos.
Spot UV alignment to the print is an aspect of the design and should be verified by your designer prior to submitting an order – and then also confirming in your PDF Proof. We do not check this alignment during the proofing process.
Our Press and Quality Control teams will ensure that your order is printed as per the accepted proof.
The minimum quantity for Spot UV cards is 500.
Shaped cards and other speciality finishes for Spot UV have a minimum quantity of 1000.
Spot UV is a clear, glossy coating applied to specific areas of your print, giving your design a striking contrast and a polished, sophisticated look. This popular feature adds an eye-catching shine to areas like logos, text, or patterns, making them stand out beautifully against the rest of the design.
While Spot UV is often used on business cards, its versatility extends to a wide range of products, including flyers, gift card holders, hang tags, and more. The real magic of Spot UV lies in its unique ability to highlight details with a glossy finish that catches the light, creating an elegant and memorable effect on any printed material.
Spot UV files should be supplied as separations. This means the Spot UV layer is supplied in a separate file (or separate page) of your press-ready PDF file.
Spot UV cards are one of our most popular products – with all industries and professions. An inexpensive premium finish, a popular choice with:
Designers – Graphic, Web, Fashion and Interior
Media Industry
PR Agencies
Event Planners
Social Media consultants and managers
Customer Relationship Management
Spot UV gloss is a layer that can be added to the surface of your business card, giving it a clear and shiny appearance. It allows you to highlight important aspects of your design or create subtle details that catch the eye in the light.
Have you seen these glossy business cards and you want to create one yourself as well? While it can look like a complex operation, it’s actually easier than you think and during this short tutorial we’ll walk you through the process using Adobe Illustrator.
Jan 18, 2022
•
4 min read
Not to worry. Enter the email address you used when you joined and we’ll send you instructions to reset your password.
We’ve sent you an email with a link to reset your password.
Check your spam and promotions folder if it doesn’t appear in your main inbox.
Didn’t receive the email?